Magnet Craft: How to Make a July 4th Poem with Magnet

You need:
Blue, Red and Yellow Craft foam sheets
Tacky Glue
Glitter Glue Pens
Poem Printed on Card Stock
Scissors
Instructions:
Cut a frame out of blue foam.
Cut out fire cracker and fuse. Glue onto frame.
Print poems on card stock. Glue to the back of the frame.
Decorate the front of the frame by gluing on sequins.
10 Magnet Projects for Fun and Science
Magnet science fair projects
By: Edwin
Meitus
Every child benefits from fun that is also educational,
and 10 fun projects with magnets fill the bill nicely. This list is
divided evenly between "experiments" (1 through 5) and "projects" (6
through 10) so you can keep the attention of your budding scientists as
well as your future artists.
There are plenty of places to get your magnets, and don't forget
the many different kinds available. They come in all sizes and shapes,
colored and plain, and even in flexible sheets that can be cut into any
shape.
For the following activities, you will need
a variety of magnets and other supplies. Instead of making one materials
list for you, however, it is suggested that you decide which activities
you (and your kids) want to do, then assemble your supplies from the
list in each activity description.
Note: The "you" in the following instructions can mean
the parent or the child. Frankly, these activities are fun and
interesting for all ages!
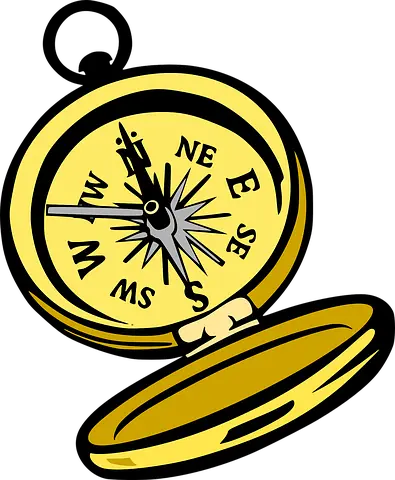
1. Make a compass
You will need the following items:
- non-metallic bowl filled with water
- metal pin
- magnet
- cork
This experiment will
show how to make a compass that points true North.
Magnetize the pin by holding it in your hand and stroking it with
the magnet in one direction only, from the base (head) to the point.
Lift the magnet off at the point, then begin again at the base. Repeat
this at least 25-30 times.
Now push the pin through
the piece of cork so that the cork is in the middle of the pin, and put
the cork/pin in the (non-metallic) water-filled bowl. The pin should
have been made magnetic enough to point North.
You
can also try seeing how strong your new pin magnet is by seeing if it
will pick up small metal objects, such as paper clips.
2. Polar attraction/repulsion A
You will need the following items:
- two (2)
bar magnets
Magnets, of course, have north and
south magnetic sides. Depending upon which ends (or sides) that you
force together, they will either attract strongly or not at all. If you
put north and south magnetic poles together, they will attract. If you
put two similar sides together, north or south, they will either not
attract or they will actually repel one another.
With this experiment, you and your children will discover the force
of the attraction or the repulsion of the magnet.
Place two opposite ends together and you will notice that they
instantly attract to one another. Lesson: north and south poles on the
magnet attract one another, at different strengths depending on the
magnets and the conditions.
Now try to force the
two north sides of the magnets together. You will be able to feel as the
poles repel one another. You can do the same thing with the south sides
and will notice the same effect. You can measure the force by holding
the same poles together and slowly releasing your hold on the
magnets.
3. Polar attraction/repulsion B
Using the same bar magnets, place them
down on a table. Take one magnet with north side pointing forward and
push it close to the other magnet's north side. The magnet you are not
holding will move away from the one you are, and even try to turn itself
around.
This shows that the south side is
attracting your magnet's north side. You can determine the magnet
strength by seeing how far away you can be and still have these
effects.
4. Polar attraction/repulsion B Again
using the same kind of magnets, but three to five of them, experiment
with pushing the magnets in a kind of "magnet train." Line magnets up
with south sides facing south and north sides facing north, then push
the first magnet and watch the other magnets jump forward.
Keep lining up magnets this way and see how many you can get to
work together in your "train."
5. The
floating magnets
You will need the
following items:
- five (5) to eight (8) "donut"
magnets (the ones with the holes in the middle)
- one (1`)
wooden rod that will fit through magnet holes
- base for rod
(wood or modeling clay)
If you cannot buy or
construct a base for the rod, you can stand it up in a wad of modeling
clay. It won't be bearing much weight, so it doesn't have to be "over
prepared."
First, determine the magnetic forces of
the donut magnets and which side is north or south.
Remember, of course, that polar opposites attract. Now put three or
four magnets along the bottom of the wooden rod as it is standing. The
positioning of the magnets is important: Place all of the magnets with
south at the bottom, so when you stack up the three or four magnets, the
north (top) part of the bottom magnet will attract the bottom (south)
side that you place on top of it. Thus, at the very top of the pile, you
will have a north side.
Place the next magnet with
the north end down. It will not attract to the north side below it, so
it will "hover" over the other magnets. You can continue the hovering
demonstration by placing another magnet, south side down this time, on
the rod. This new magnet will also hover, as will any others you
position on the rod (remembering to alternate the north/south
orientation).
6. Sheet magnet fun A:
Refrigerator magnets
You will need the
following items:
- several letter-size sheets of
flexible magnetic material, white on one side
- family photos
or kids' artwork
- glue or paste, scissors
Have the kids decide whether they want to make their refrigerator
magnet with a drawing or a photo. It could be great fun for each child
to make his or her own photo magnet.
Cut the
drawing or photo out and trim it nicely. Place it on the magnetic sheet
and trace the shape with a pencil, then cut the shape out of the
magnetic sheet. Glue the drawing or picture to the magnetic material.
7. Sheet magnet fun B: Word magnets
You will need the following items:
- list of common words for sentence formation
(Internet)
- computer and printer (alternative: Sharpie
pens)
- several letter-size sheets of flexible magnetic
material, white on one side
- glue or paste, scissors
On the Internet you will find various sources for lists
of commonly used words. You need a selection of nouns, verbs, articles
and other kinds of words for sentence formation, but include a few
family favorites, names, nicknames, etc.
Print out
the list on your computer printer, with each word in a 1/2-inch by
2-inch area. Alternatively, if you do not have a printer you can use
Sharpie pens to write the words on 1/2-inch by 2-inch strips of the
magnetic sheet.
Cut and paste the words onto
appropriately sized strips of the sheet material. Place the magnetic
words on the refrigerator or stove front. Leave surprise messages for
one another, make up silly sayings or have fun just jumbling them up!
8. Sheet magnet fun C: Kiddie business cards
You will need the following items:
- several letter-size sheets of flexible magnetic
material, white on one side
- kids' artwork and old magazines
(for pictures, words)
- glue or paste, scissors
Trace a standard business card on the sheets, or draw a 2-inch by
3.5-inch rectangle. Have your kids find pictures that apply to their
personalities tigers for the rough and tumble, princesses for the
dainty little ladies, or vice versa! They can write their names, and
make themselves the president of any company they'd like to invent. The
finished cards can go on the fridge, inside their school lockers or
anywhere else a magnet will stay put.
9.
Colored magnet tic-tac-toe
You will need
the following items:
- bag of colored magnets (same size,
different colors)
- a 5-inch square of magnetic sheet, white
on one side
- ruler and Sharpie pen
Draw
a tic-tac-toe playing square on the magnetic sheet. This will go on the
fridge, the front of the stove or some other centrally located place.
Keep a bag of similarly-sized magnets of different colors near the play
square and, picking one color for yourself and another for your
opponent, make a tic-tac-toe move each time you pass by that area. Check
through the day and watch for your opponent's move. This is a great way
to stretch a game of tic-tac-toe out for a day, sometimes, while giving
you the opportunity to grab a snack out of the fridge, too.
10. Personalized memo-holder
You will need the following items:
-
bar magnet, at least 1/2-inch wide, three (3) to four (4) inches long
- paper, colored pens and pencils, scissors, glue
Trace the shape of the bar magnet onto a piece of paper. This
will show you how much room you have to write your name and draw a
design. You can write your name simply or color your letters
differently, even adding designs and other shapes. Cut the piece of
paper out and glue it to the side of the bar magnet. Now you have a way
to put your "to do list" or your "memo to Mom" on the fridge door,
stove front or any other magnetic spot.
What with
all the letters and shapes and pictures and name-tags resulting from
these projects, there could be a real upsurge in "magnetic publishing"
in your house. The magnetic words, in particular, have great educational
value, and the lessons learned in the simple magnet experiments are
helpful as well as entertaining. With just a few magnets and art
supplies, you can attract a whole lot of fun to your house!
More crafts
Happy 4th of July! We Hope You Enjoy Our 4th of July Crafts.
The whole family is sure to enjoy these Patriotic Poetry and Songs.
Have a family picnic with a sing-along and crafts at your next 4th of July party.
Fun kid crafts that inspire kids creativity and they love to make. Parents and teachers appreciate the simple directions and easy to find and use craft supplies.
About Us-
Contact Us -
Privacy Policy©2023 TheParentVine.com a brand owned by GADL Enterprises, LLC. All rights reserved.
TheParentVine.com earns commissions on products sold.